 Reassembly
 The new data plate looks good! |
 The Donaldson air cleaner gets installed with the correct brackets and thumbscrews. |
 Auto-Lite generator |
 Gas pedal with new boot. |
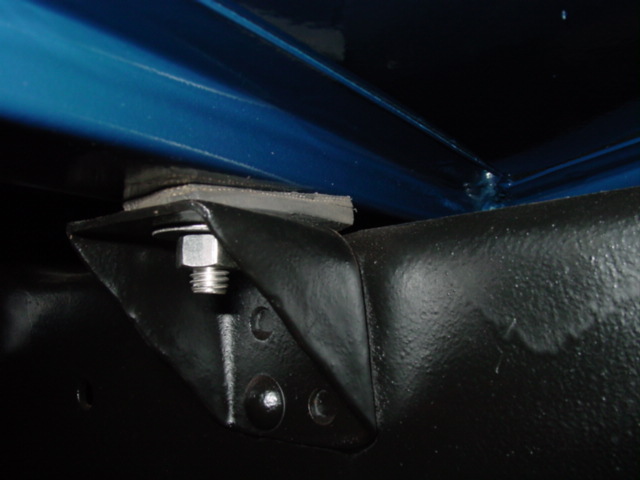 I used an old tire to make new body mounts. The several plys of rubber are a close match to the original mount. You can also see the nice clean underside of the body. |
 All new welting was used in between the fenders and body. The welting was from Northstar Willys. |
 Even the steering column was treated to new welting. |
 For some reason the the original headlight buckets were this shade of brown, so they were treated to fresh paint and reinstalled. |
 The brown makes an interesting contrast. |
 I chose a set of NACO tail lights, while not 100% original, they are the closest thing on the market right now. |
 Both pedals received new draft pad kits from Walcks. |
 The parking brake cable was cleaned and lubed, and installed with the correct hardware. |
 This is the correct mount for the parking brake cable on the center crossmember. |
 With the fenders and grill installed, Eugene is finally coming back to life. This is the point when all that hard work pays off. |
 The grill got new welting and a windshield hold down strap. |
 The back end of Eugene is looking good! See the Restoration Details section for the painting of the tailgate. |
 The radiator and shroud got a good cleaning and repaint. |
 The radiator is installed with these correct capture nuts. |
 A new steering column boot is stalled with the correct hold down brackets. |
 The wiring harness showed up from Walcks and I must say I was impressed. The harness includes all the correct cloth covered wire. Installation was simple and straight forward. |
 This a just an example photo of the cloth covering and original style connectors. |
 Instead of buying a new 3 post junction block for the fender, I restored my old one. |
 The kit even had the headlight plugs installed. |
 Here you can see the 6v battery with correct hold down bracket and J-bolts I fabricated. |
 No detail is left out. Here you can see the toolbox gasket installed. |
 New shifter boots from Northstar Willys. |
 With the windshield installed, it's all starting to come together! |
 It never feels good to drill holes in a nice shiny, freshly painted body!!! |
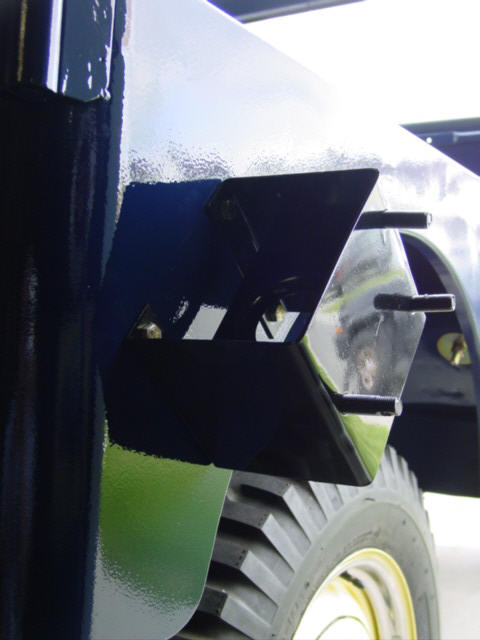 I actually did a lot of research to make sure the spare tire carrier was installed oriented the correct way. This is a new carrier from Walcks. |
 The only new hand-operated windshield wiper on the market is for a CJ-2A. As you can see here, it's too short. The 3A wiper was 2" longer. |
 The wiper is cut and a 2" section of steel is cut to fit. As you can see, all the ends are angled to allow more weld penetration. |
 Here's the arm welded |
 ...and the finished product |
 The seat frames were in excellent condition, but the covers needed to be changed |
 I found a Time Capsule while recovering the seats! |
 I chose black vinyl seat covers from New Life Resources (see the Parts Suppliers section). |
 |
 Tailgate chain covers from Northstar Willys |
 Lookin' good! |
 Hood blocks from Walcks |
 I installed a new mirror kit from Walck's. It came in olive drab, so I took it apart and painted it gloss black. |
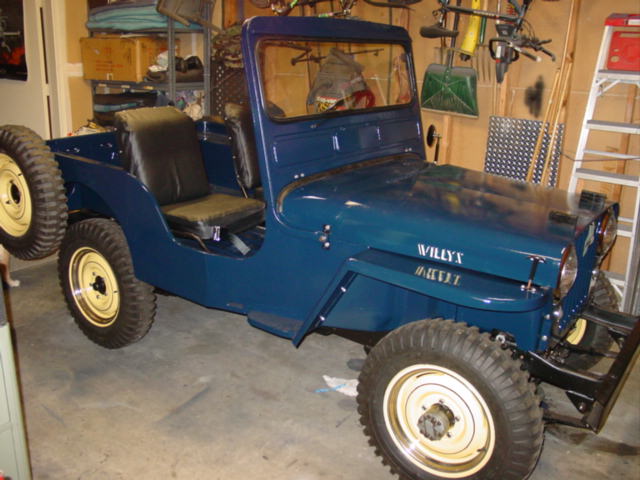 Pretty much done, with the exception of small details. I still have not started it up yet! |
 My vacuum wiper motor is from a 2A and is temporary until I find the correct Trico motor. |
 Here is the correct routing of the vacuum line. |
 Both wipers are now installed. |
 I installed new seatbelts from Westco Performance. |
 The dual action fuel pump adds two more lines to the already crowded left side. There are five lines all competing for the same space. I tried to match a factory photo of the routing of these lines. |
 No, I am not in Minnesota, but these original 1950 license plates will look good on it at car shows. I really want to find some 1950 Colorado plates. |
 The air cleaner tube is finally installed with the correct hose clamps. Note the correct clamps on the oil filler vent tube as well. |
|


